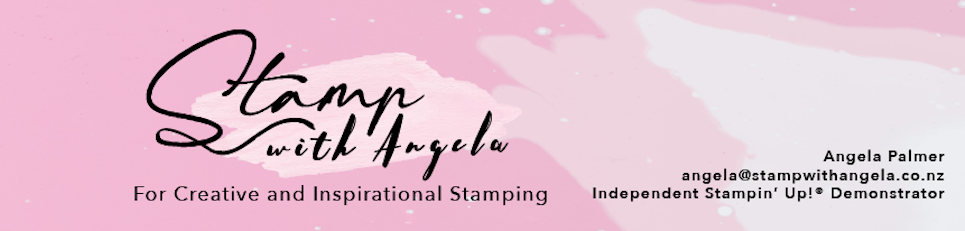
Today’s tip is on how to do the shaving foam technique. You can create lots of interesting and colourful backgrounds with this technique and its fun too! Here is a card I made featuring the paper I decorated using the shaving foam technique.
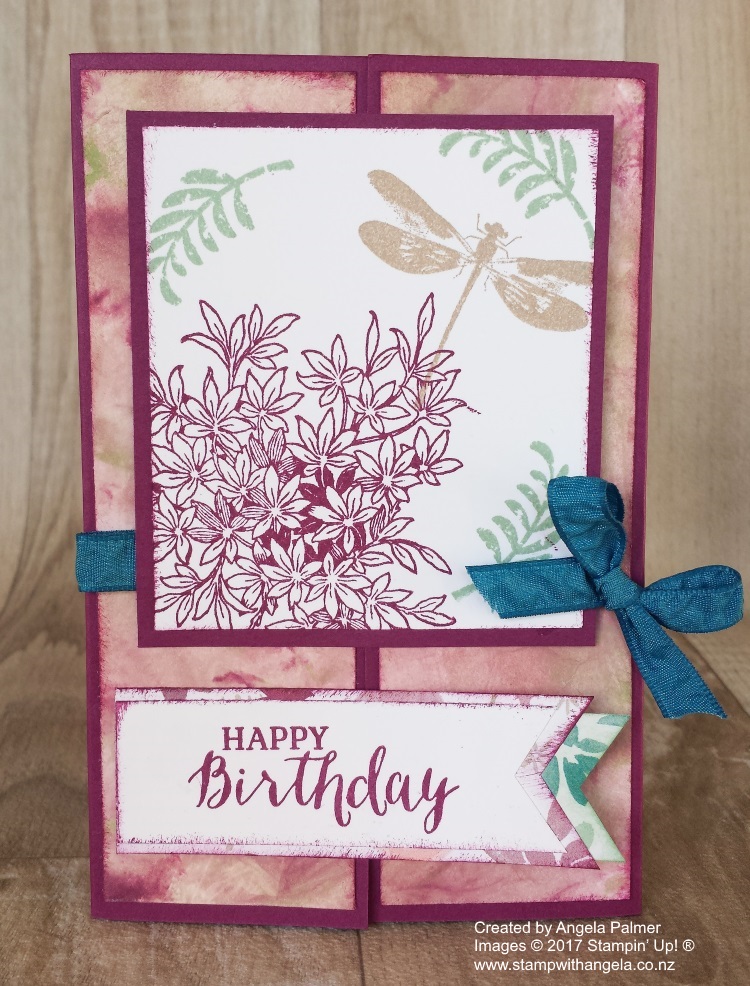
Here is the inside of the card with a strip of the shaving foam designed cardstock at the bottom:
What do you need for the shaving foam technique?
Shaving Foam – budget one is fine!
Paper/plastic plate
Reinkers
Kebab stick or something similar
Old gift card
Whisper White cardstock
How do you do the shaving foam technique?
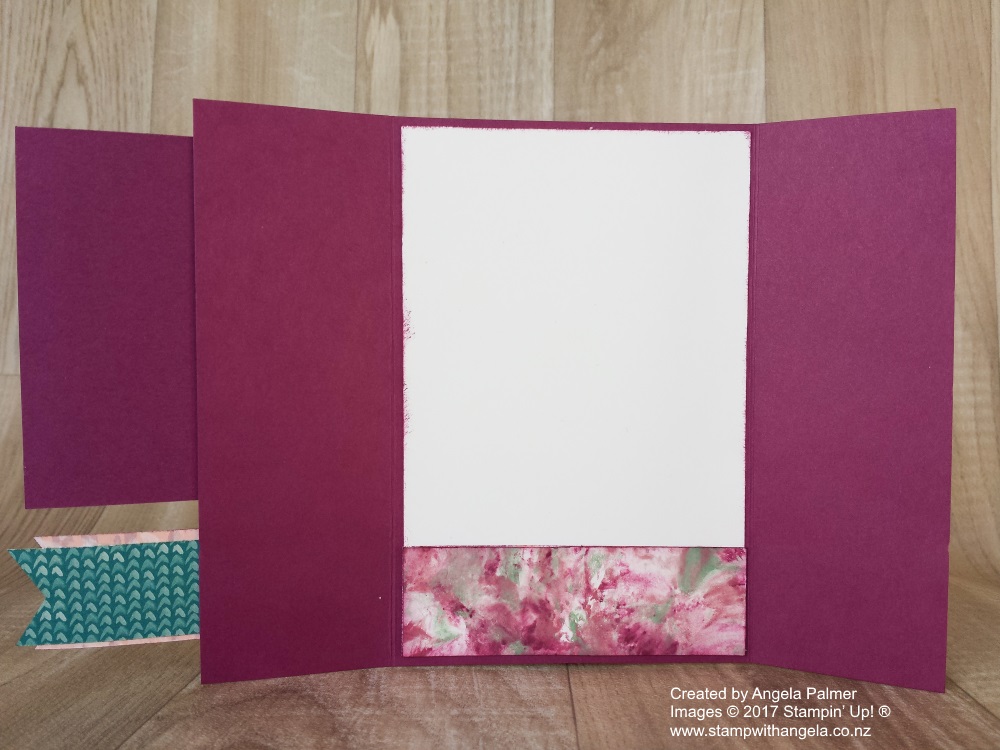
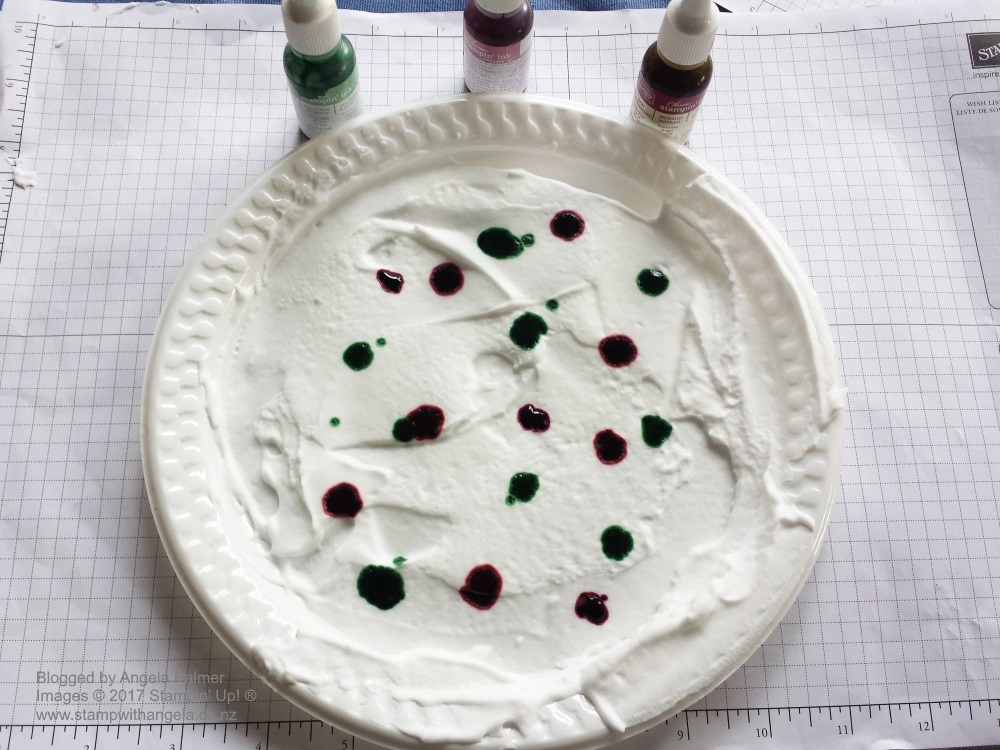
Step One: Put some shaving foam on a paper plate and smooth it out with an old gift card.
Step Two: Drop some drops of reinkers onto the surface of the shaving foam. I have used Sweet Sugarplum, Mint Macaron and Rich Razzleberry.
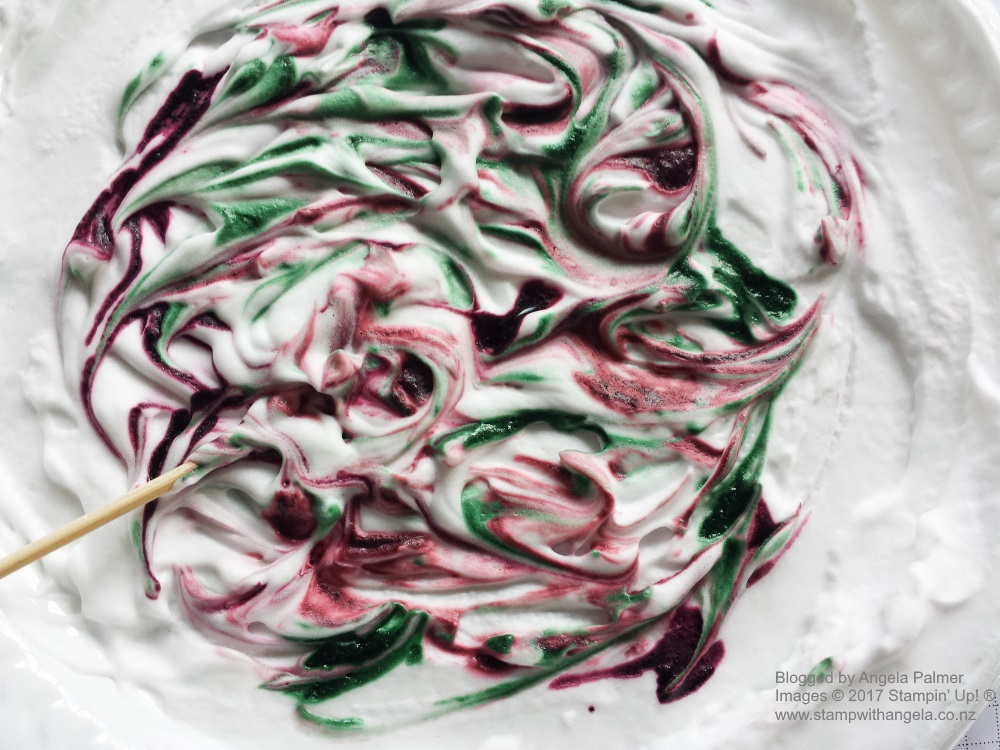
Step Three: Using a kebab stick, or something similar, swirl the reinker around until patterns form and the colours mix. Do not overmix, or it will become muddy.
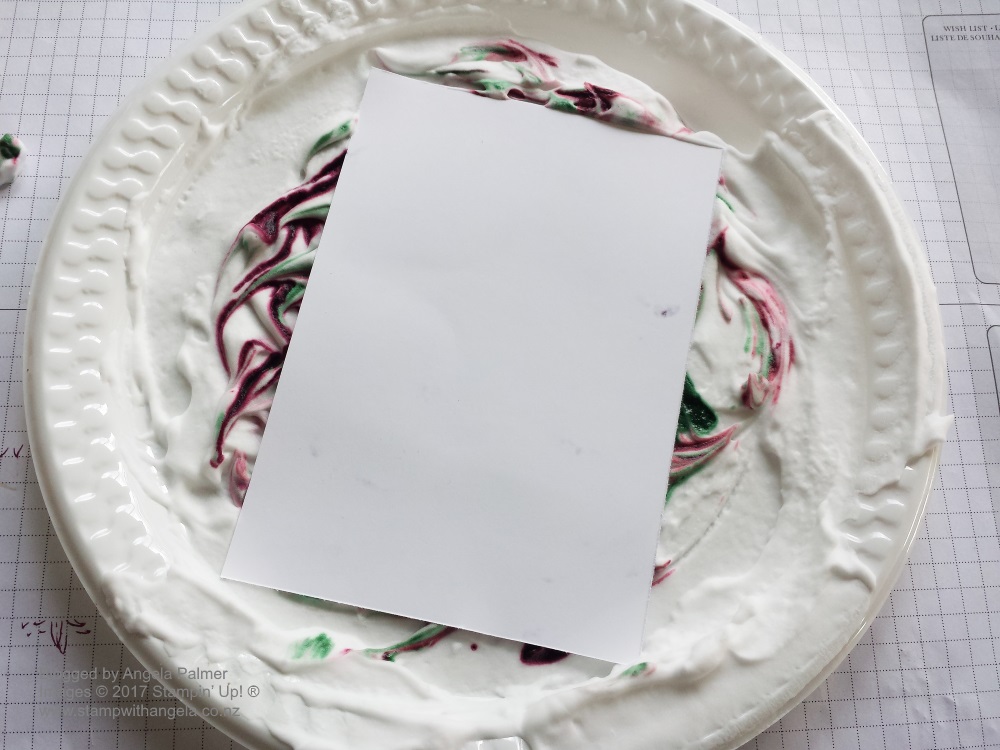
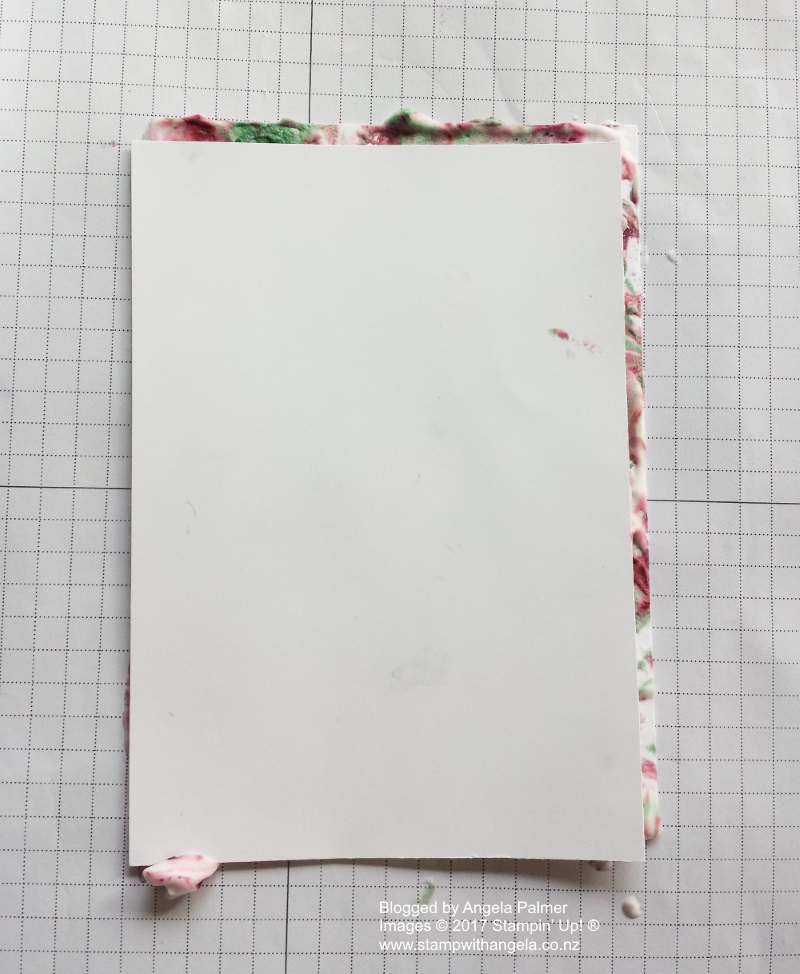
Step Four: Lie your piece of Whisper White cardstock on top of swirly inked shaving foam.
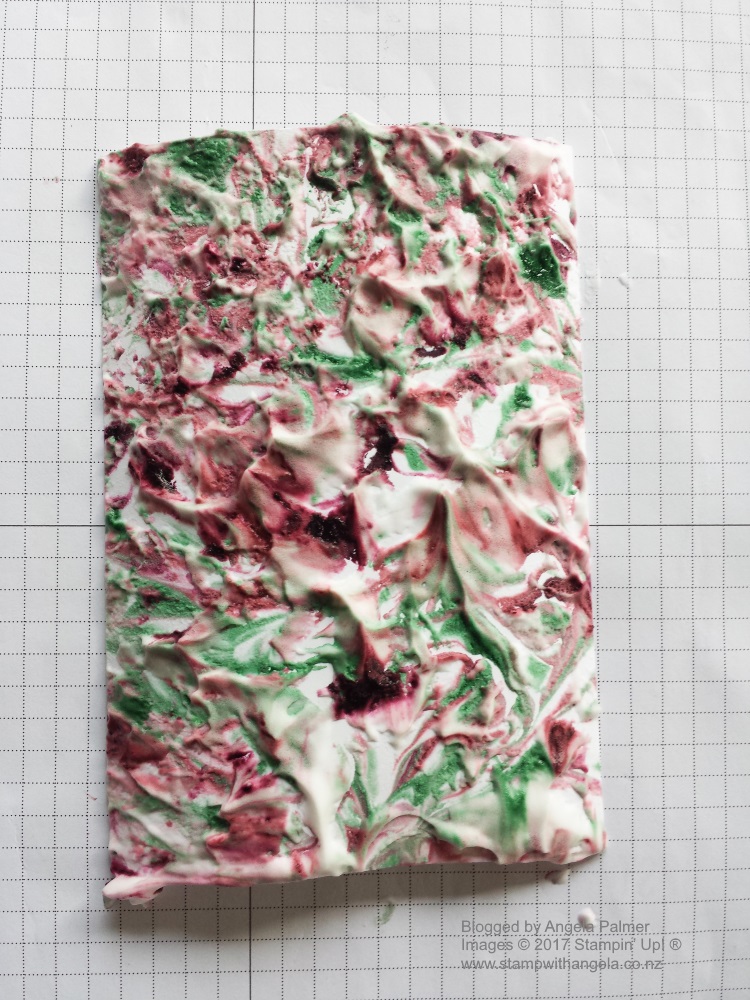
Gently lift it up and it will look like this.
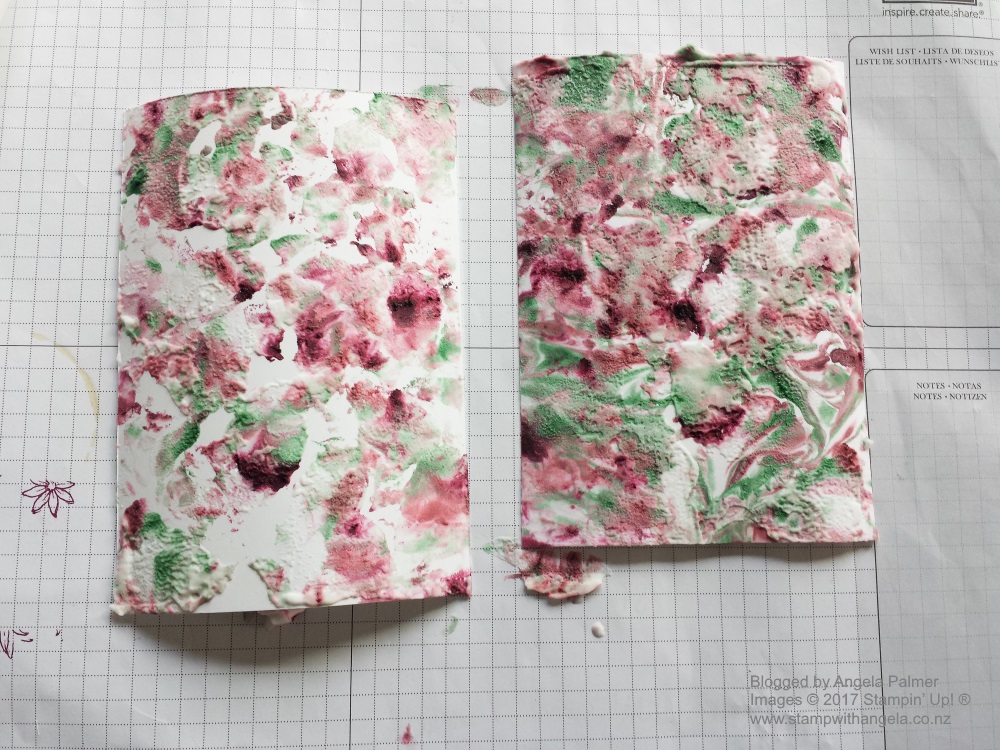
Step Five: Sandwich the piece you picked up with another blank piece of Whisper White cardstock like as shown in the photo below. Press some of the excess shaving foam out and wipe away.
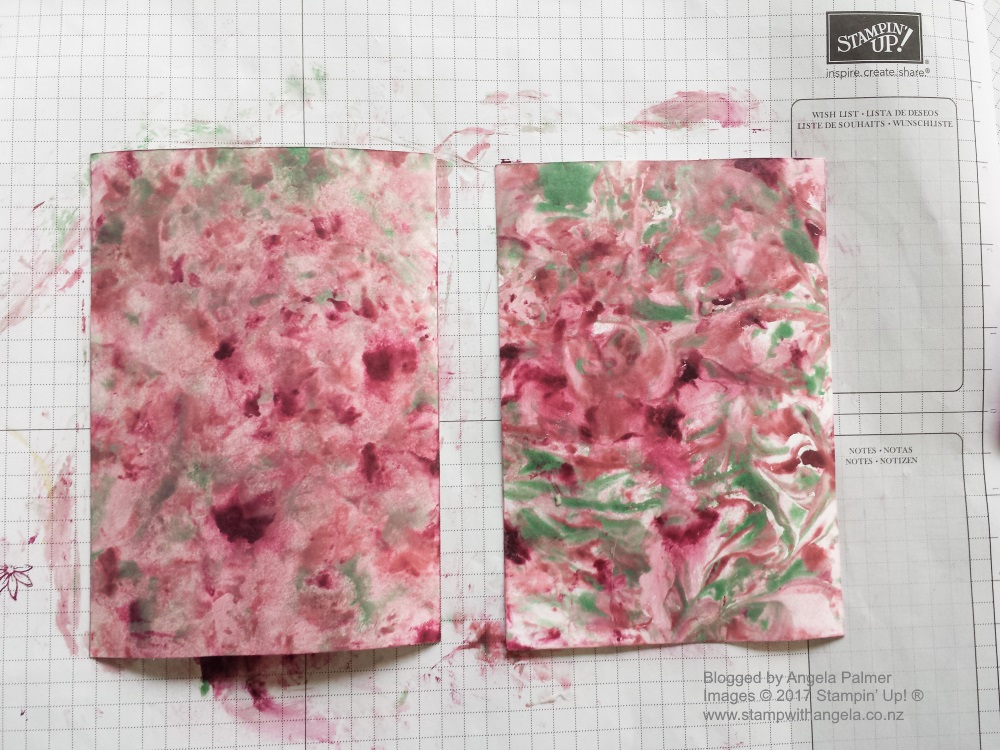
Step Six: Pull the two pieces of cardstock apart. They will look like this.
Step Seven: Very carefully wipe any extra shaving foam off, trying not to smudge it.
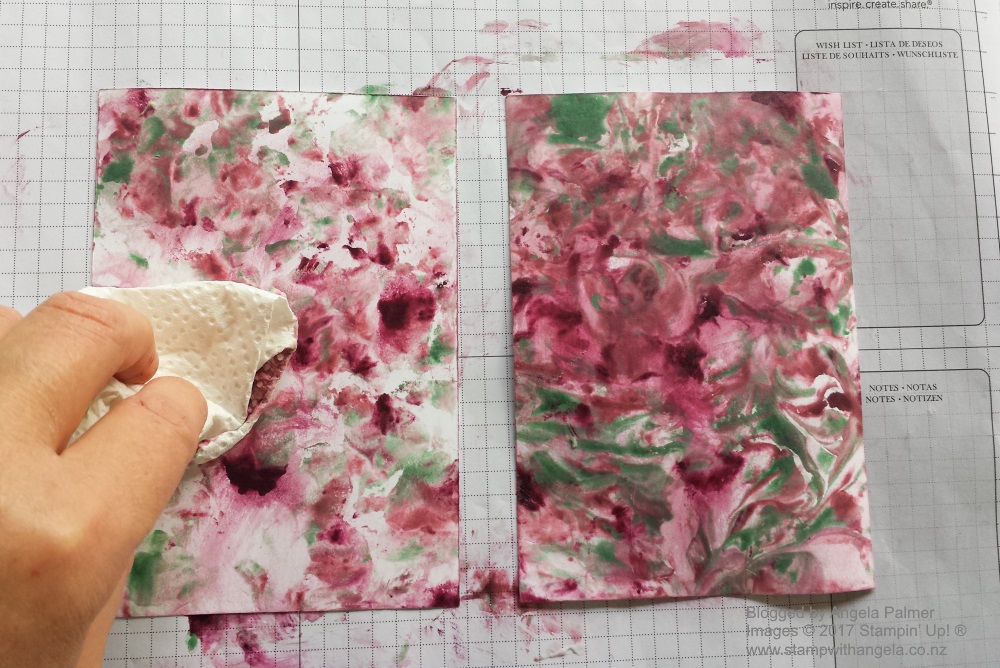
Step Eight: If either piece of cardstock has some blank patches that you don’t like, (like one on the left in step eight), dip it into the shaving foam again.
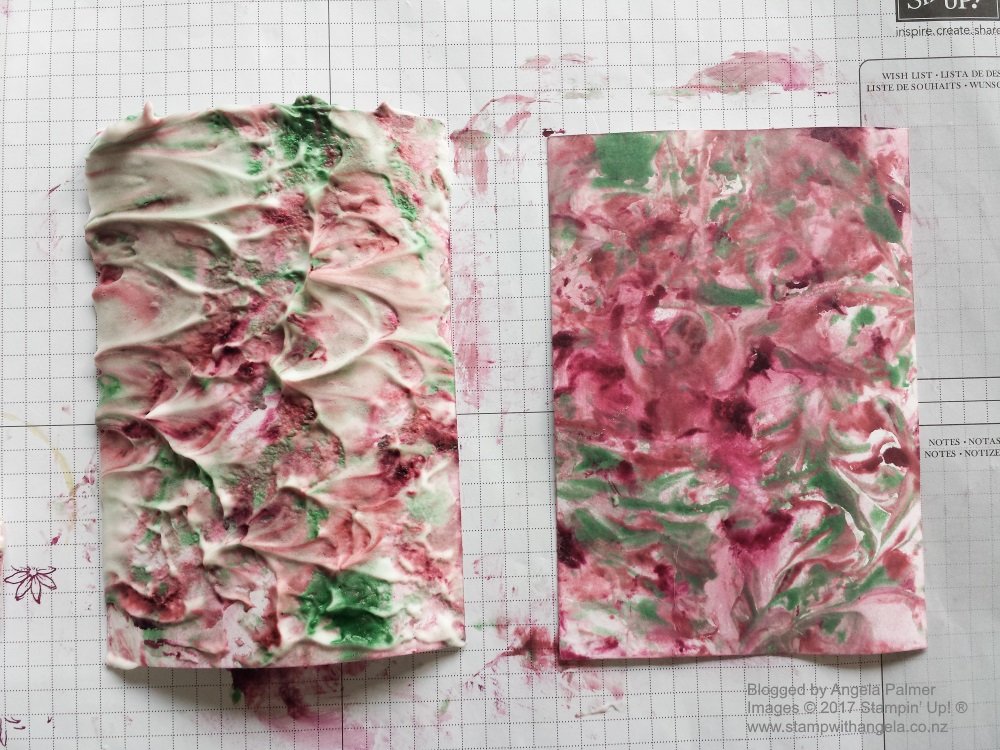
Step Nine: Wipe off any excess shaving foam and it will look like this. Your card piece will be smooth and soft to touch.
Step Ten: Cut your cardstock to size and use in your card creation.
If you would like to learn how make the Overlapping Gate Fold card featured at the beginning of this post, or like the one in yesterday’s post, please contact me. In the next week or so, I will be holding another class showing you how to make it. If you are not local, I hope to offer it as an online class, so please email me and let me know you are interested and I will put you on my early bird list for when my online class is launched. In the meantime, I hope you have found this photo tutorial useful and you will give the shaving foam technique a try.